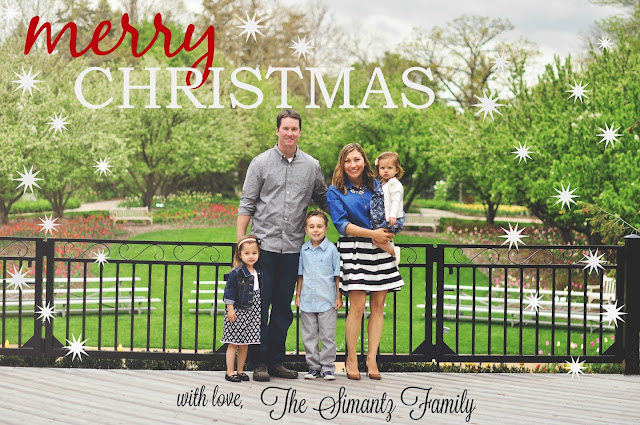
Anyway, last year I designed our card (for free) myself using PicMonkey and didn't document the process, so I thought I would this year. PicMonkey has tons of options to choose from for free, and they have even cooler stuff if you become a Royale member, but this Mama is all about free, so that's the route I take when I use their site.
Here is last years card (I loved how it turned out!)
Ok, so first thing I do when I'm getting ready to make our card is browse other websites to get ideas. Once I see something I like and that can be closely replicated, I then go to PicMonkey and get started.
Here is the picture I chose for this years Christmas card
Step 1. Once you log onto to PicMonkey, hover your curser over the top of the page and options will drop down. Click on Design.
Step 2. Click Open and chose your image you are going to design
Step 3. Your image will now be to the right and you need to choose the Tt on the left hand side to get to the text options.
Step 4. Start messing around with different fonts and choose what you like best. You can customize the color and size as well. Just click add text and a box will appear on your image. You can drag it anywhere on the design.
Step 5. Click on the butterfly logo to the left - that is where you find the overlays, aka the objects you can use to enhance your design. Choose whatever one works for you!
As you can see, I clicked on one of the stars and just added a bunch to my design.
My idea was to make them look like snowflakes so I changed them to white and made them smaller.
I chose to scatter the snowflakes on each side of my card to look like falling snow
Step 6. Once you are done adding overlays to your design, it is time to go back to the text (Tt) and choose your font for your signature. You can do this at the same time as you are writing your holiday message, but I like to do it at the end.

Now you can upload to anywhere and have them printed. I usually choose Costco or Vistaprint because they are the most inexpensive for good quality. I also always choose just to buy the cards, not the envelopes because I can go to Michaels and get 50 for a good price while using a coupon of course!
Here's a tip if you do use Vistaprint - upload your image and have it printed on a postcard in your choice of size, it is a fraction of the cost vs. using an invitiation or holiday card template.
I would love to know if anyone uses this method to create their holiday cards!
Oh and if you like this post, you can hover over the below image and pin it directly to Pinterest to save for when you need it! (and it would be much appreciated!)
*linking up with Jessi's Deisgn for What's Hap-Pinning


Haha! This is AMAZING. I am going to remember that for years that Minted isn't an option ;). For me it was totally random but also a stroke of luck too. I don't expect it to ever a happen again.
ReplyDeleteAhhhhh!!!! <------- That's me screaming because I love this so, soooo much! This is fantastic, Lizzie!!
ReplyDeleteThis is a genius idea! And probably saves a ton of money versus using companies like tinyprints and minted! I always wait for the big deals and sales that they have for their holiday cards, but this might be even more cost effective!
ReplyDeleteLove this! I like to make our Christmas cards, too. Thanks for showing your process - your cards look great!
ReplyDeleteYou're welcome and thank you!!
DeleteLove this! Your family is adorable!
ReplyDeletehttp://brittscozycorner.blogspot.ca/
Umm you just stole my heart today! Excellent idea!
ReplyDeleteI am so impressed!! Both cards are awesome...I used to use PicMonkey all the time. Maybe it's time for me to start using it again! :)
ReplyDeleteGreat job, friend!
What a great tutorial, Lizzie! We made our cards a few years ago with Picmonkey and really liked how they turned out. Pinning this for you! And seriously though, I'm right there with you...hello, Minted and Shutterfly we're here too :)
ReplyDeleteBeautifully Candid
I usually create our own but this year I got really lucky and get to work with Minted. I do use PicMonkey to create birthday party thank yous.
ReplyDeleteThis is awesome...def saving this for myself! Love how your card turned out!
ReplyDeleteLizzie, this is brilliant!!!! I use Picmonkey for everything, but I've never thought to design my own Christmas cards with it! I pinned it!
ReplyDeleteI never thought to use PicMonkey...and I use it for everything! This is genius!
ReplyDeletexo, Lily
Beauty With Lily
This comment has been removed by a blog administrator.
ReplyDeleteHow fun and easy. I use PicMonkey all the time, but never thought to do my own Christmas cards. Now I just may. Love the photo you chose.
ReplyDelete