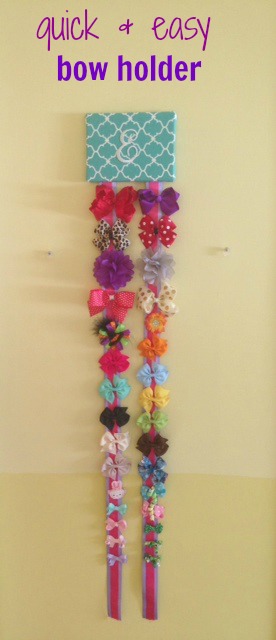
Today I'm showing you a cute and easy DIY bow holder I made for both my girls. It was a quick project, maybe 20 minutes and they turned out adorable!
For this project you'll need:
 |
- a small canvas - your choice of size (I did a 6" x 9")
- fabric - enough to cover your canvas
- iron on letter (this is optional)
- 2 colors of ribbon, one wider than the other
- glue gun
- scissors
First you'll cut your fabric to fit around your canvas. Then place your fabric pattern side down and then put your canvas face down on top. Fold the fabric over the corners of the canvas and hot glue down. Then take each end and fold over the back of the canvas and hot glue. It doesn't need to look perfect since this is the back that no one will see.
Next I ironed on the letter on each canvas
Then I took the first color ribbon and cut really long strips - I didn't measure but if I had to guess probably almost 3 feet (you can make this any size you want) - I cut another strip the exact same size so I would have 2 sets.
I then took the smaller ribbon and cut 2 strips the same exact size as the first.
Next you will hot glue the smaller ribbon to the center of the wider ribbon - do this for both strips.
Turn your canvas back over and hot glue each strip to the back of your canvas, again, I didn't measure exactly how far apart, I just eyeballed it.
That's all! Now you have a super cute bow holder that didn't take you very long at all to make!


No comments:
Post a Comment