I made sure to do my homework on how to get the wall magnetic, so many things I read said their wall was NOT magnetic even after 2-3 coats. I knew this meant I needed lots of coats. I started the project on a long weekend when the hubby went out of town. Before he left he taped the wall off for me and made sure the lines were perfectly leveled. He knew if he left that up to me we would definitely have had a lopsided chalkboard wall.

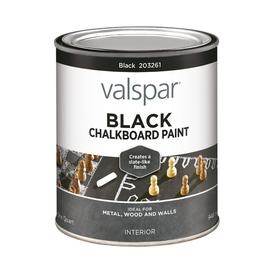
I used Rust-Oleum magnetic primer and Valspar chalkboard paint (I had the chalkboard paint on hand already and have read that Valspar is much better than Rust Oleum)

When the magnetic primer directions say to stir before use, that is an understatement! Get ready for an arm workout. It took me probably close to 20 minutes just to stir the primer around and even then it wasn't perfectly stirred, but I couldn't stir anymore! I did 5 coats of the magnetic primer because I wanted my magnets to stick! I waited 30 minutes in between each coat and I did this over 2 nights while the kids were sleeping.
Then I did 3 coats of the chalkboard paint - this needed much more time to dry in between (1 hour) so again, I did it over 2 nights.
After the last coat of chalkboard paint I let the wall sit for a day before I prepped the board. Once I was ready I used a piece of yellow sidewalk chalk turned on its side and rubbed it all over the board. Then take a paper towel or cloth and rub the chalk into the board, in circular motions.
**Warning** this gets messy!! I had a drop cloth put down below and yellow chalk dust still went EVERYWHERE, so just be careful and be ready to vacuum.
 |
Once the wall was prepped, it was time to have fun with it!! I went to Joann's and had the kids pick out some cute little wooden pieces to turn into magnets - I had to use 2 little magnets on the back of each. I was happy to see that our magnetic letters & numbers that we already had stick to the board just fine.
And here she is!!!!!

My 4 day project is finally completed!! And of course, when the hubs came home I begged him to add the rod and buckets below it to finish off the look.
The rod, hooks & buckets can be found at Ikea.


No comments:
Post a Comment